Creating a new user account is a very simple task in Mac OS. If you remember, creating new user accounts in Windows 10 is really easy to do, but for now, let’s look at why you want to do this and how to remove user accounts as well.
Why Create a New User Account in Mac OS
One of the first reason I would create another user account in OS is to have a separate account that doesn’t have admin rights. I’ve mentioned before what could happen when you use your Windows 10 administrator account as a regular user account, and the same can be said for OS. Like I have said before, it is best to use a regular user account and enter in your administrative credentials when needed. Another reason to add user account is for your family, kids, spouse, and your cat if necessary. Other reasons could be for work, school, or the organization you are in requires multiple user accounts. So there are a lot of benefits from creating extra user accounts. Here is how to do this.
Create a New User in Mac OS
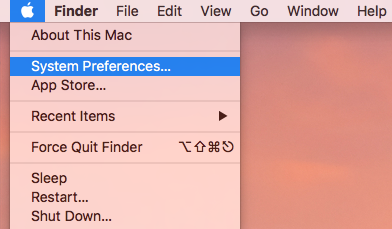
To create a new user, make sure you have your admin credentials handy, click on Apple icon in the upper hand corner and click System Preferences.
The System Preferences window will open and click on Users & Groups.

On the Users & Groups menu, click the lock in the bottom left corner.

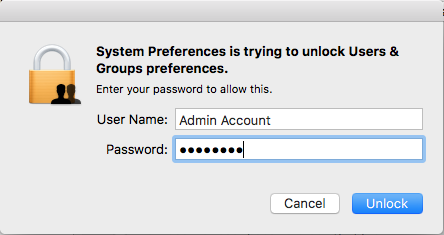
You will be prompted for your admin rights, enter them here and click Unlock.
You will be taken back to the User & Groups menu. Click the + sign to create a new user.

The new user account window will open. The first option is what type of Account. Here you can select an Administrator, Standard, Managed with Parental Controls, Sharing Only, or Group. Let’s discuss each below.
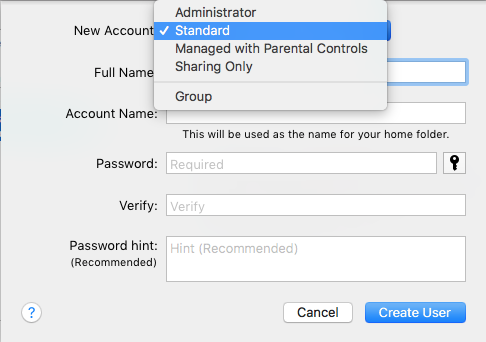
Administrator account, there needs to be at least one, has full control over your Mac. You can create multiple admin accounts if needed.
Managed with parental controls is the best account for kids or any one who needs a guiding hand when using the Mac. These users can access only the apps and content the admins specified. You can even restrict the contacts, website access, and place time limits on computer use. The administrative account will set these conditions.
Sharing only accounts lets you create a user account that doesn’t need direct access to the Mac. This account is good if you frequently share files since they can remotely connect to access those files. You can also utilize AirDrop for this, but we will talk about that in another article.
Group accounts give multiple users the same access privileges. This group will have the same access to shared files and folders. This is handy if you need to give multiple users access to files or folders on your Mac. All you have to do is create the group, add the users, and make sure that group has access to the files or folders.
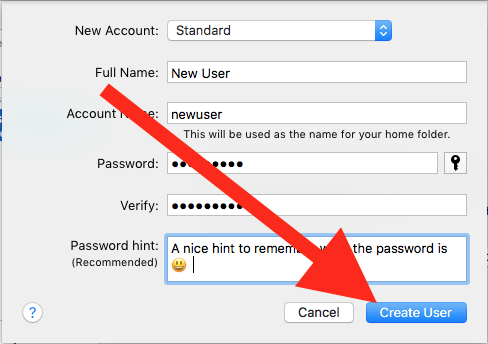
Now that is all said and done, select the user account that best fits your needs. Enter the required information and click Create User.
You’ll go back to the Users & Groups and will see your new user listed below.

How to Remove User Accounts in Mac OS
To remove a user account, head back the Users & Groups setting. Click the lock icon and enter in your admin rights. Then select the user you want to remove and click the – button.

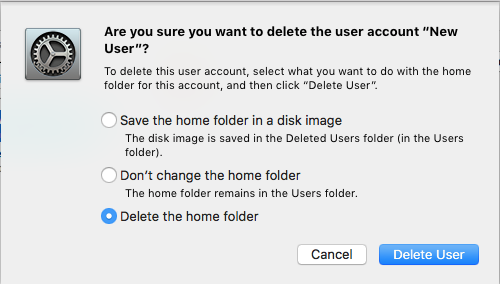
The next window will give you some options when deleting the user. The first option, Save the home folder in a disk image, saves the home folder as a disk image and stores it in the Deleted Users folder, which is under the Users folder.
The next option is Don’t change the home folder. This keeps the home folder in the same location. For example, \User\NewUser would remain the same after removing the user account.
The last option is a complete wipe. You will delete the home folder and have no trace of that user. Well besides any applications they installed.
Select your option and click Delete User.
That user will be removed form the Users & Groups menu and that is it.
